Creating handmade soaps at home can be a delightful and fulfilling craft, allowing you to customize your soap with scents, colors, and ingredients of your choice. Not only is making your own soap a fun and creative project, but it also enables you to control the ingredients, making it a healthier option for your skin. If you’re interested in learning how to make handmade soaps at home, follow these simple steps to get started on your soap-making journey.
Gathering Your Supplies
Before diving into the soap-making process, it’s essential to gather all the necessary supplies. You will need a heat-resistant container, a thermometer, a scale, molds for shaping the soap, essential oils or fragrance oils for scent, colorants, a mixing spoon, and most importantly, the base ingredients for soap making – lye (sodium hydroxide) and oils or fats. Make sure to choose high-quality oils and ingredients to ensure the best results for your handmade soaps.
Safety First
Safety is paramount when working with lye, as it is a caustic substance that can cause burns if not handled properly. Always wear protective gear such as gloves, goggles, and long sleeves when working with lye. Ensure that your workspace is well-ventilated to avoid inhaling fumes. Keep a bottle of vinegar or citric acid nearby to neutralize any spills or accidental contact with lye.
Measuring and Mixing
Accurate measurements are crucial in soap making to ensure that the chemical reaction between lye and oils occurs correctly. Weigh out the required amount of lye and water separately, as well as the oils or fats you will be using. Slowly add the lye to the water while stirring carefully to avoid splashes. Allow the lye solution to cool while you melt the oils or fats in a separate container. Once both mixtures have cooled to the desired temperature, slowly pour the lye solution into the oils while stirring continuously.
Adding Scent and Color
This is the fun part of soap making where you can get creative with scents and colors. Add your chosen essential oils or fragrance oils to the soap mixture, stirring well to ensure even distribution. You can also incorporate natural colorants such as herbs, clays, or oxides to achieve the desired hue for your handmade soap. Remember that some scents and colors may change during the curing process, so it’s essential to test a small batch before making a large batch of soap.
Pouring and Molding
Once your soap mixture is well-blended with scents and colors, it’s time to pour it into the molds for shaping. Silicone molds are excellent for soap making as they are flexible and easy to remove the finished soap from. Smooth out the top of the soap mixture with a spatula and tap the molds gently on the counter to remove any air bubbles. Allow the soap to cure in the molds for at least 24 hours before unmolding.
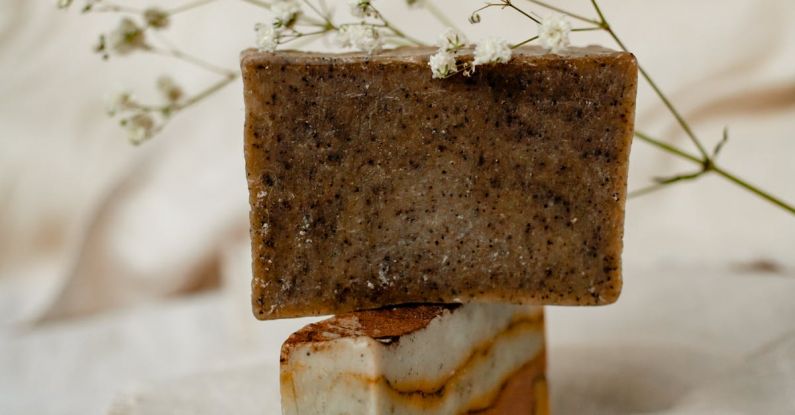
Cutting and Curing
After the soap has set in the molds, carefully unmold it and cut it into bars or shapes using a sharp knife or soap cutter. Place the cut soap bars on a drying rack in a cool, dry place to cure for 4-6 weeks. During this curing period, the soap will harden and the excess moisture will evaporate, resulting in a milder and longer-lasting bar of soap.
Enjoying Your Handmade Soaps
Once your handmade soaps have cured, they are ready to be used or gifted to friends and family. Wrap them in decorative paper or store them in airtight containers to preserve their freshness and scent. Enjoy the satisfaction of using soaps that you have crafted with your own hands, knowing exactly what ingredients are in them and feeling the nourishing benefits on your skin.
In conclusion, making handmade soaps at home is a rewarding and enjoyable process that allows you to create personalized soaps tailored to your preferences. By following these simple steps and safety precautions, you can embark on a soap-making adventure that will leave you with beautifully crafted soaps that are both gentle on the skin and a delight to use. So gather your supplies, get creative with scents and colors, and start making your own handmade soaps today!